
Introduction
There are a few routes to take when it comes to setting up the software for your stream. Since we want this route to be as easy as possible to execute, we’ll go with what the author is familiar with – Streamlabs OBS. If you’re unfamiliar with Streamlabs OBS, it’s a modified version of OBS that implements a bunch of features to make setting up a Facebook stream easier. Based on my experience, it turns into a very straightforward experience – there’s no need to deal with setting up stream keys.
To start off, head over to the official Streamlabs website to download the program. Once you’ve installed it, login to your Facebook account (the one which you use to manage your Facebook Gaming page) and you’re set. You won’t have to worry about any other streaming settings. Streamlabs will automatically configure the video, audio and bitrate settings for you (you can still customize it manually if you wish) once you’re logged in.
Now comes the creative part – setting up your stream’s look. A stream can be as basic (i.e. only-gameplay footage) or as complex as you want it to be. This will be up to your imagination and creativity, but here are some examples of how to set up some basic scenes.
Scenes
Scenes are the bread and butter of OBS – they determine what is shown to your audience when your stream is live. From your gameplay, to camera, to text, messages etc – imagine them as different parts of a movie, and you as the streamer, are the director who decides what the audience sees.
There are plenty of free templates available online if you don’t want to spend so much time designing the look of your stream, but in this guide, I’ll give you some basic tips and ideas on how you can set it up.
First, let’s get to know the Streamlabs user interface.

Like I mentioned earlier, a scene determines what the audience sees on your stream. What you see is what you get (there are some things such as widgets and chatboxes that don’t preview if you’re not live but you don’t have to deal with that at the moment).

To create your first scene, click on the “+” icon and put in a name for the scene. You can call it anything you want or rename it later if you like. If you’re going to have many scenes set up, it’s best you have names that allow you to identify what you want to show on screen. Here’s an example of my naming scheme, which is very straightforward: Starting Soon, Mobile Gaming, BRB, Dota 2, Gaming No webcam – when I’m streaming, I know exactly which scene to choose depending on what I’m doing.
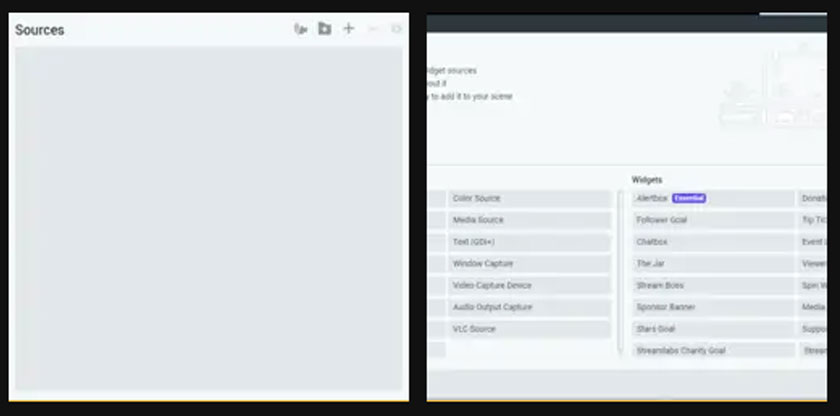
For this example, let’s call it your “mobile gaming” scene. This will be the scene where you’ll spend most of the time if you’re playing a mobile game. Next, look at the Sources box, where you will add all the different elements that make up your scene. If you click the “+” icon, a list of things you can add will appear. Select Video Capture Device and click Add Source. You can leave the default name for now since you won’t have multiple video inputs for your smartphone.
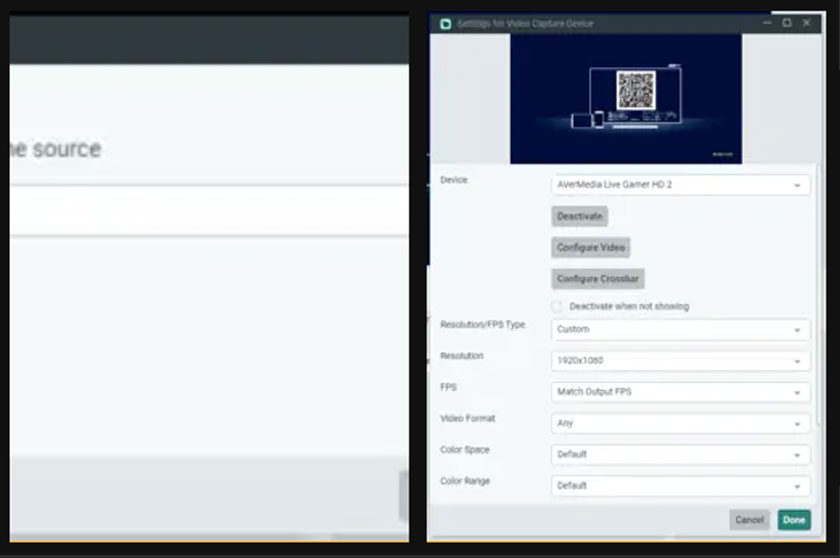
In the Device dropdown menu, locate your video capture device (for me, it’s the AverMedia Live Gamer HD 2). This will enable you to use the video feed from your phone on your stream. For Resolution/FPS Type, set it to 1920 x 1080 (or whatever resolution you are planning to stream at).
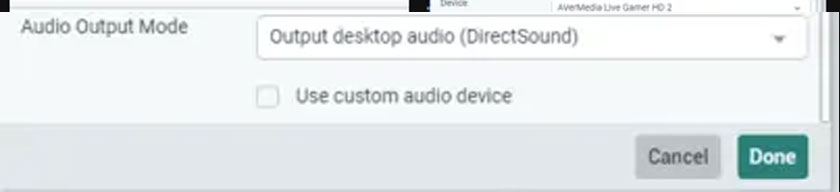
Here’s the first tricky part. By default, if you have your smartphone is outputting HDMI video, the audio won’t play from your phone. While it will be on your stream, it’s not going to play through your computer’s speakers, which means you’ll be playing without sound. Here’s how we fix that: scroll to Audio Output Mode, click the dropdown menu and select “Output desktop audio (DirectSound)”.
Now, connect your phone to your video capture device to test it out – if you’ve set it up correctly, your phone’s display will appear on your scene. If you don’t hear any audio from your phone, we’ll address that later in the Mixer Settings.

Next, let’s add your webcam to the scene – after all, everybody wants to see the streamer! Click “+” in the Sources box again. Again, select Video Capture Device and click Add Source. In the following window, make sure you select “Add a new source instead”. You can name this one “Webcam”. In the Device dropdown menu, locate your webcam (for me, it’s the Logitech C920). For Resolution/FPS Type, set it to 1920 x 1080 or whatever resolution your webcam supports. It’ll be too big at first, but we can resize it after. Click Done.
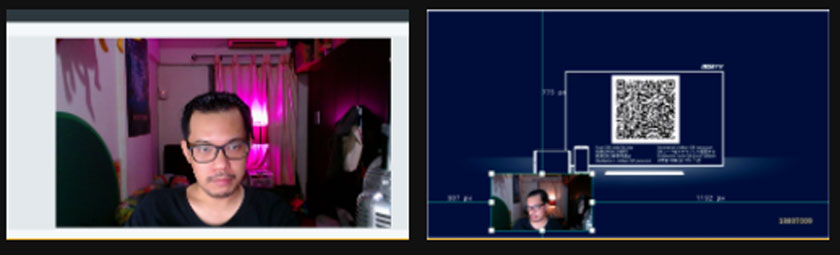
You should now see the webcam completely covering your scene. Click on it in the Editor Display (the scene preview window), and there should be 6 boxes that appear around the webcam footage. Click and drag the boxes to resize the webcam until it’s a size you’re happy with. If the webcam is showing too much, you can also press alt and drag the boxes to crop the video. If you mess up, it’s easy to reset it – right-click the box, Transform > Reset Transform. You can also drag the whole video around to change its position. Adjust it until it is a size and position you’re happy with.
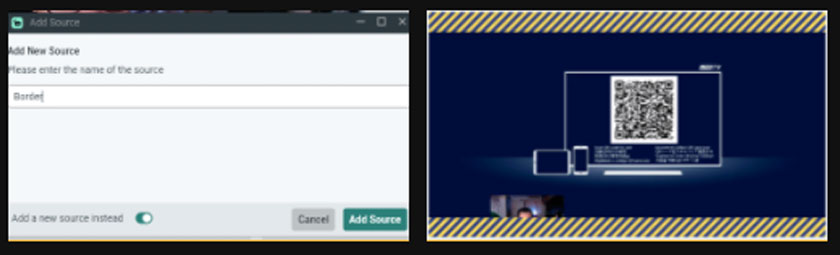
Let’s spice up the scene with some images. Click on “+” in Sources again, and this time, select Image and click Add Source. Use any name you want, I call mine Border. Next, browse your computer for an image you want to use – take note that you can use transparent images in Streamlabs OBS, so this will allow you to get creative with how you want pictures to be shown on your stream. Personally, I don’t have a lot of fancy visuals on my stream – just a simple border that frames my mobile game footage that is made from a transparent PNG. Once you’ve selected the image, click Done. On the scene preview, you can adjust the image the same way that you adjusted the webcam video. If you have a low-end computer, minimize the number of moving images on screen, they do take up additional processing power.
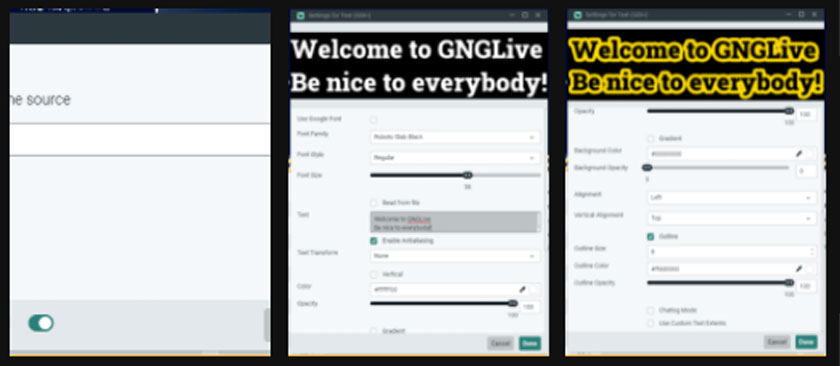
Next, we can add some text. In my scene, I use text to display some URLs for my viewers – you can use text for whatever you like. Click the “+” in Sources, and select Text (GDI+), Add Source, and give it a name (I call it “Stream info”). Here, choose what font you want to use, the size for the text, and the color. If the text has trouble showing up against the video of your stream, there are options for background or outlines to help the text stand out. In the Text box, you can type out what you want to show. Click Done once it’s complete.
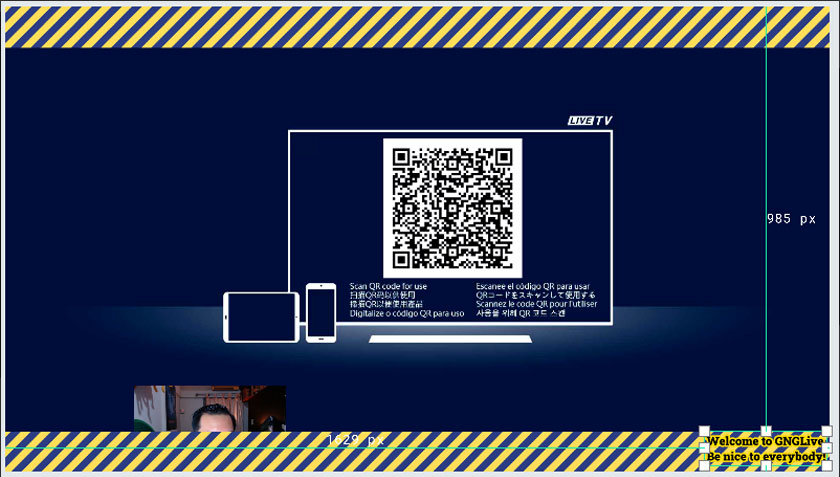
And there you have it – your very first scene! By following these steps you should get a feel of how to create your own scenes in Streamlabs OBS.

One thing to take note of: the order of your sources matter – the higher the source, the closer it is to the foreground. This means that if your webcam source is below your video capture device source, it will be blocked – you have to drag it to the top. If you have borders for your video, the border should be above the video source to block out parts of the video. Play around with the source order by dragging them up and down the list and you’ll get the hang of it.
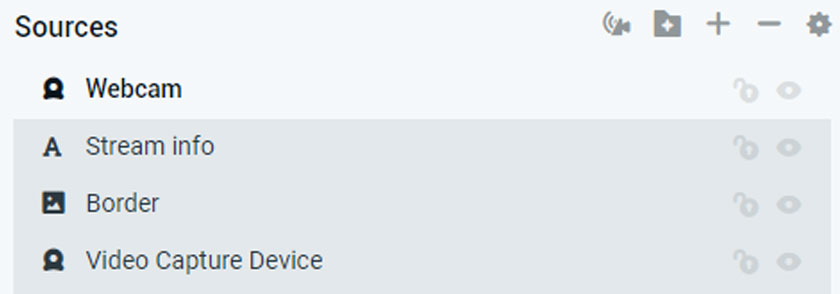
There are two icons to the right of the source names – clicking the lock locks the scene, so you can’t make changes to it (no accidental resizing etc.), while the eye icon will hide the source from the scene. If you want to quickly hide or show a source, you can use this function.

If you need to make some changes to any of the sources, double click them to quickly bring up the settings window, or right-click them and select Properties.
Here’s some of my other scenes, and how I set up my sources:
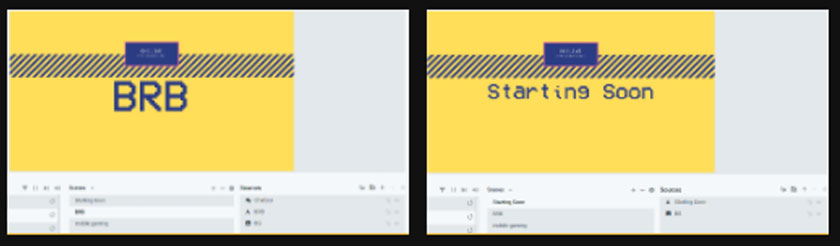
As you can tell, they are very simple scenes – just an image for the background and some text on top. I use these scenes to let my viewers know when my stream is starting soon, or when I need to be away for a bit. Not everybody needs to have these scenes, but they can be more useful than not informing your audience or latecomers about your current status.
Adjusting the Mixer
The Mixer is where all your audio sources are listed. If you have a source that plays sound, you’ll be able to monitor and adjust the sounds accordingly here. Immediately, you’ll be able to adjust the volume, and mute/unmute your audio sources. Once you become more familiar with Streamlabs OBS, there are plenty of options you can tweak.
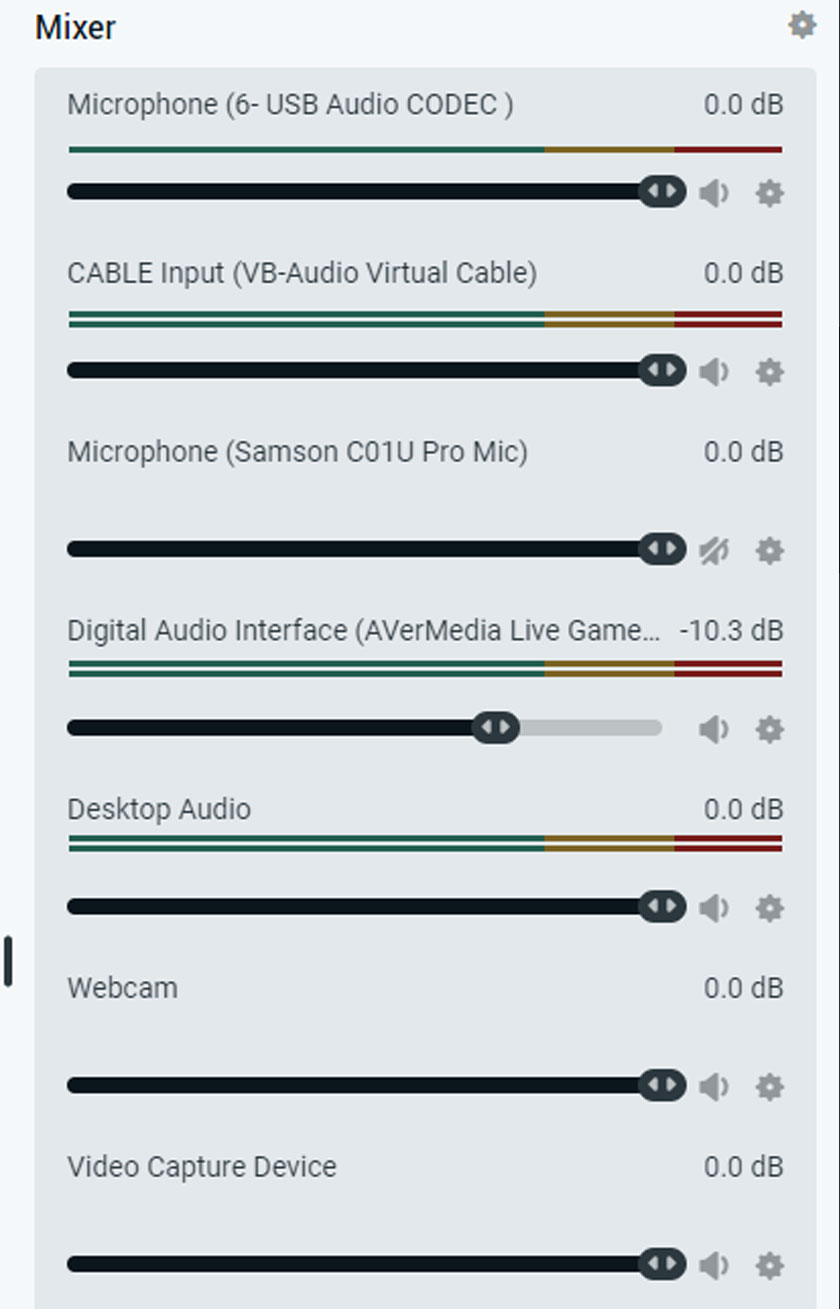
Firstly, let’s address the issue of your phone audio not playing through your speakers. When your phone is transmitting video output through HDMI, the speakers on your phone won’t play audio anymore, it will be going through your computer instead. However, by default, your computer is not set up to monitor the audio from your phone. To fix this, click the gear icon in the Mixer box. The following window will appear:
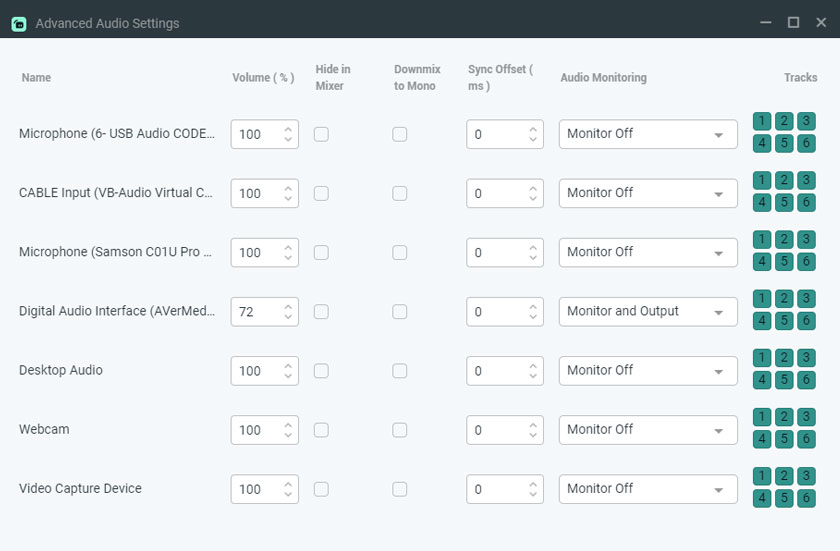
By default, your video capture card will be set to ‘Monitor off’. Look for it in the list, select the drop-down menu and click ‘Monitor and Output’. To avoid your microphone picking up audio from your speakers, use headphones for your PC audio, lower your PC volume, or put your mic as far from the speakers as possible. It’s not great having your game sounds echo on your stream, so keep that in mind when tweaking your audio settings. From my experience, there will be a slight delay coming from the audio on your computer compared to when you’re gaming using your phone’s speakers. It’s not bad enough to mess up your gameplay, but it’s definitely better than not being able to hear any audio at all.
Other than that, from here you can also adjust the volume of your audio sources: make sure that the audio from your game isn’t too loud so that your viewers can hear you speak through your microphone. It’ll require some testing to get the balance right, but once it’s done you don’t have to touch them again unless your hardware changes.

Once everything is set up properly, you can go live. But if you’re worried about your settings being incorrect, the best way to test out your stream is to record a clip first. Click the “REC” button on the bottom right of Streamlabs OBS and record a few seconds. Play your game a bit, speak into the mic and so on, and stop the recording. Go to the folder where the recording is saved, this can be adjusted in the options menu, and watch the clip. If the visuals look good, the audio sounds balanced (not too loud/soft), you’re good to go!
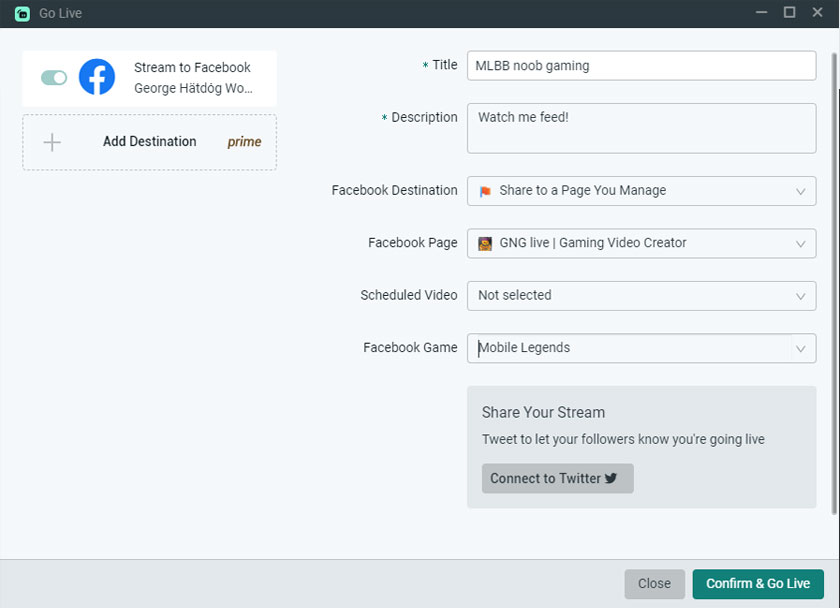
The only thing left to do is to hit “Go Live”. A window will pop up allowing you to input your stream title, description, select your game, and choose which Facebook Page you want to post it to. When you’ve put in all the details, just click “Confirm & Go Live” and your stream will begin after a few seconds. Be sure to share your stream with your friends on Facebook so they can tune in to watch you play. When you’re finished, click the “End Stream” button. You are now a Facebook Gaming streamer!
There are many more things you can do in Streamlabs OBS that isn’t covered here, but by following these steps, you’ll be up to speed on broadcasting your very first stream. Feel free to drop comments below or on Facebook if you have any questions and I’ll try to address them. Stay tuned to eGG Network for more content on being a Facebook Gaming creator!


